

CHECK THE ORIGINAL FIRST
Why the iPhone video looks blurry
When learning how to unblur a video on iPhone, the right fix depends on whether the blur exists in the captured frames or was introduced by storage, sharing, playback, or an export.
- Photos library original
Check the full-quality capture before a shared copy becomes the reference.
- Compressed shared copy
Messages or social apps can resize and encode the clip again.
- Compatible upload copy
Export one standard H.264 copy only when another tool needs it.
How to fix a pixelated video on iPhone
First, reopen the clip from the Photos library rather than a Messages, social, or downloaded copy. If the original is clear but the shared file has square blocks or smears during movement, the problem is the shared encoding—not the iPhone camera. Transfer the original or make one compatible export, then compare the same moving moment before trying enhancement.
| What you notice | Likely cause | First check |
|---|---|---|
| The clip sharpens after waiting on Wi-Fi | iCloud is fetching the full-resolution original | Let the download finish before exporting |
| A Messages or social copy is softer | Sharing compression or resizing | Return to the Photos library original |
| The subject is soft but the background is sharp | Focus was placed elsewhere or Cinematic focus is intentional | Review the focus behavior and original capture |
| Everything smears only during movement | Camera or subject motion during exposure | Compare a static moment; severe motion blur is limited |
| Dark areas are noisy and soft | Low light, high ISO, or a large shadow lift | Adjust exposure gently and inspect faces |
| The file is clear until uploaded elsewhere | Platform processing or playback quality | Compare the local original and online quality setting |
ON-DEVICE WORKFLOW
Make the useful detail easier to see
The practical answer to how to unblur a video on iPhone starts with the built-in Photos workflow for light, color, crop, and reversible corrections. Treat it as tonal editing, not a true defocus-recovery tool.
- Open the library original in Photos
Use the item captured or imported into Photos, not a copy downloaded from a chat. Wait for the full-resolution version to become available.
- Tap Edit, then Adjust
Review Exposure, Brilliance, Highlights, Shadows, Contrast, and related controls. Use small changes that improve the subject without revealing excessive noise.
- Compare with the original
Apple provides an original comparison while editing. Watch the moving clip, not only the frame shown when playback is paused.
- Keep an untouched copy
Photos edits can be reverted to the original. If you export a separate file, keep the full-quality source too.
- Use enhancement only for a compatible defect
Low resolution, moderate softness, or compression may respond to enhancement. Severe focus or motion blur remains a limited case.
- Check the result on the phone and a larger screen
Small screens can hide bright halos, waxy skin, and unstable detail. Inspect the result at the size where you will watch it.
IPHONE FORMAT CHECK
Use a standard H.264 copy for the most reliable upload
An iPhone can record High Efficiency HEVC or Most Compatible H.264. The file name alone does not tell you which format was used.
PixelatedFix currently works most reliably with standard H.264 video. HEVC/H.265, HDR, and 10-bit video are not supported yet. If your clip is not accepted, keep the original and export a compatible copy.
For future recordings
On supported iPhones, open Settings → Camera → Formats → Most Compatible. Apple states that new videos then use H.264. This improves compatibility but usually creates larger files than High Efficiency HEVC.
For an existing HEVC clip
Preserve the original, then export a compatible H.264 copy with an Apple or third-party workflow that does not reduce the resolution unnecessarily. On a Mac, Apple documents using QuickTime Player’s Greater Compatibility option.
PREVENT BLUR NEXT TIME
Capture more reliable frames on iPhone
Better focus, steadier motion, and more light preserve real detail that editing cannot create later.
- Tap the subject and confirm focus before recording.
- Add light rather than relying on a large exposure lift afterward.
- Use a stable grip, support, or tripod for static scenes.
- Choose 4K only when you have enough storage and light and actually need a 4K video.
- Use the recorded frame rate intentionally; higher fps needs more light and data.
- Keep the camera original before sending a compressed sharing copy.
On supported models, Apple also exposes Auto FPS or Auto Low Light FPS and recording resolution/frame-rate controls. Available choices vary by iPhone model.
REAL BEFORE & AFTER
Use faces, dark texture, and fine detail as the test
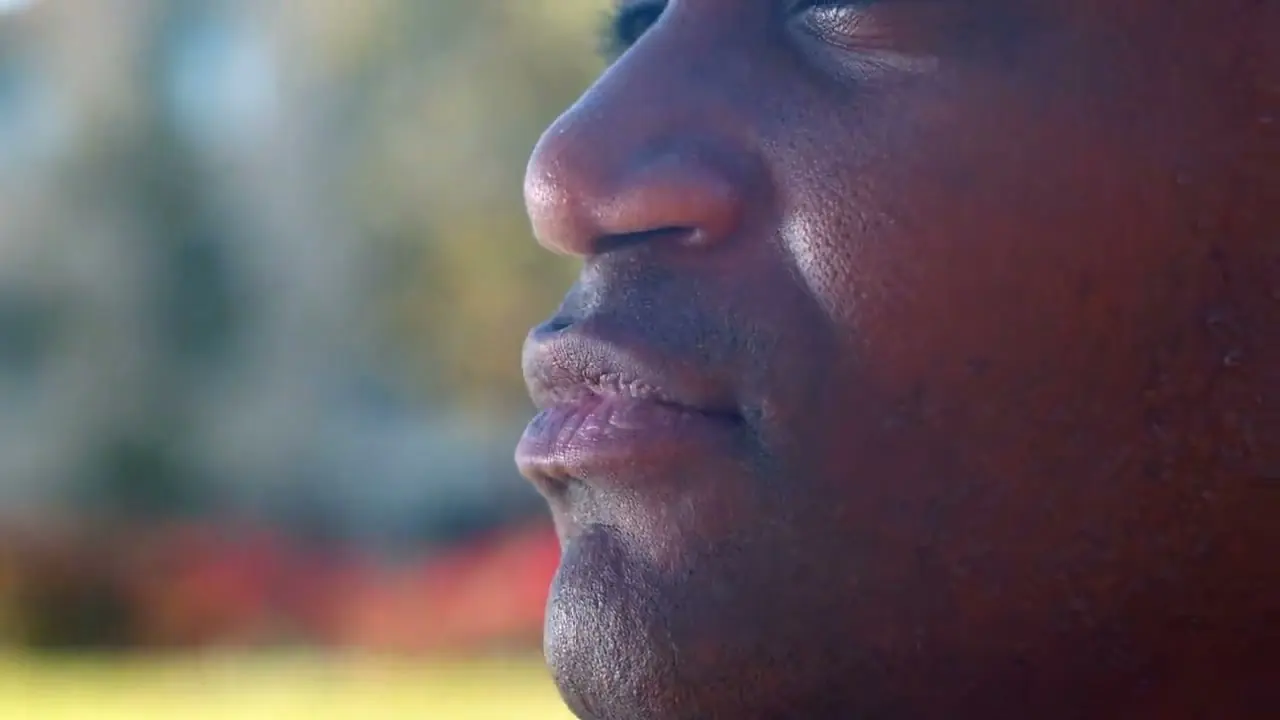
Faces, dark areas, and fine texture quickly reveal waxy smoothing, false detail, or flicker. These are real five-second Pro 4K results; compare them carefully before processing your own source.
CASE 01
Real portrait: compressed 720p to Pro 4K
A real outdoor close-up enhanced to 4K with Pro Quality. Inspect skin texture, facial edges, eyelashes, and the softly focused background.
- Before
- 1280 × 720
- After
- 3840 × 2160
- Quality
- Pro Quality · 4K
- Look at
- Skin texture, facial edges, and eyelashes
Verified Pro Quality result · Same five-second input · Processing record checked
Portrait upscaling case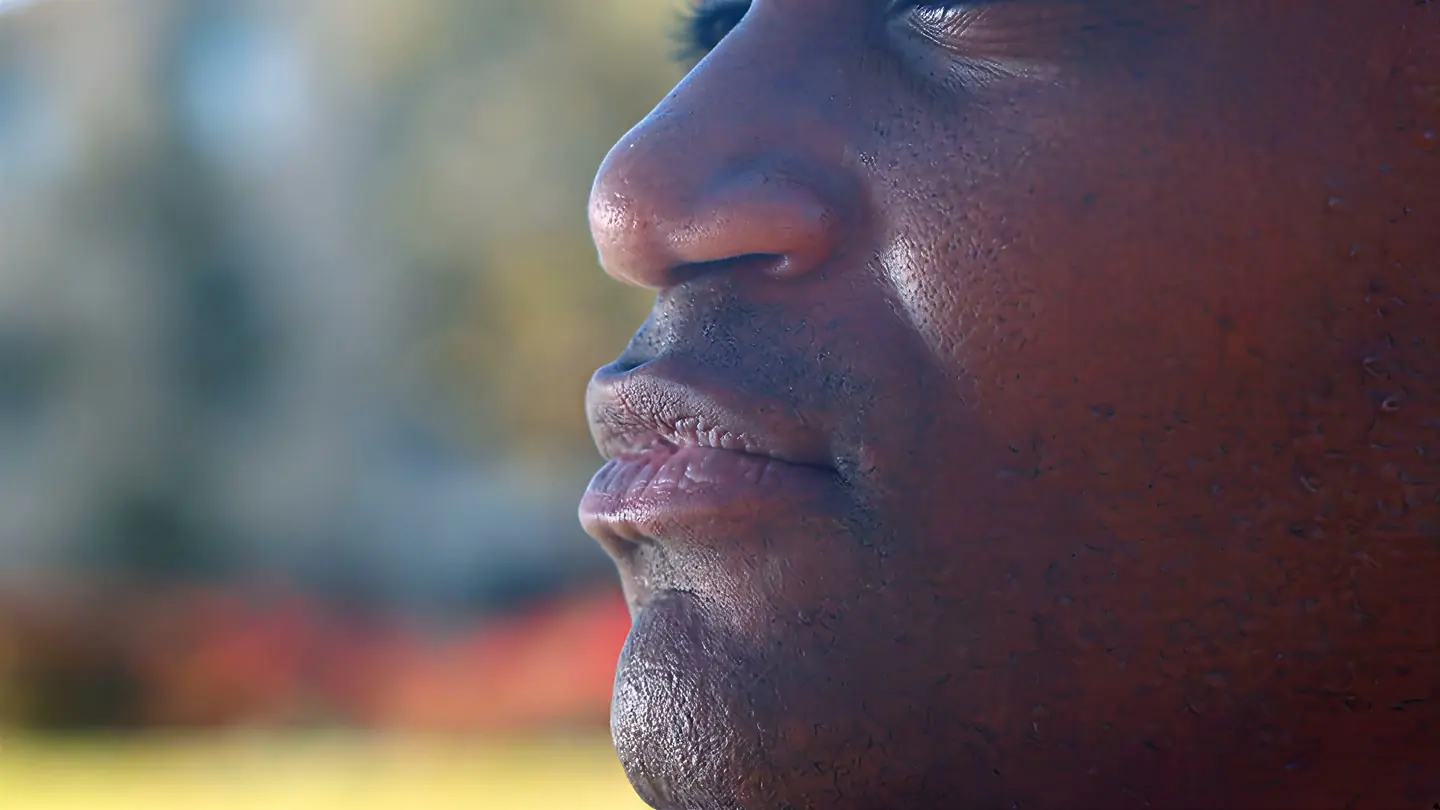
Web playback rendition derived from the verified Pro 4K output. Review focus: Skin texture, facial edges, and eyelashes.
CASE 02
Night traffic: compressed 720p to Pro 4K
A real nighttime street clip enhanced to 4K with Pro Quality. Compare moving vehicles, road markings, small lights, and dark building edges.
- Before
- 1280 × 720
- After
- 3840 × 2160
- Quality
- Pro Quality · 4K
- Look at
- Moving vehicles, road markings, and small lights
Verified Pro Quality result · Same five-second input · Processing record checked
Night upscaling case

Web playback rendition derived from the verified Pro 4K output. Review focus: Moving vehicles, road markings, and small lights.
CASE 03
Flower detail: compressed 720p to Pro 4K
A real five-second flower clip enhanced to 4K with Pro Quality. Compare the red petals, purple leaf edges, and fine texture in the same frames.
- Before
- 1280 × 720
- After
- 3840 × 2160
- Quality
- Pro Quality · 4K
- Look at
- Petals, leaf edges, and texture
Verified Pro Quality result · Same five-second input · Processing record checked
Flower video case

Web playback rendition derived from the verified Pro 4K output. Review focus: Petals, leaf edges, and texture.